My Planner helps you plan and manage your teaching activities on a weekly calendar.
You can add and view the following on My Planner:
NOTE: You cannot schedule Lessons on Non-Teaching Days.
When you add a Lesson to My Planner:
NOTE: You must first create a Class before using My Planner.
You can access My Planner at any time.
To access My Planner, on the Menu bar:
ConnectED displays My Planner for (a) the selected Class and (b) the current week . My Planner displays weekdays, Monday-Friday.
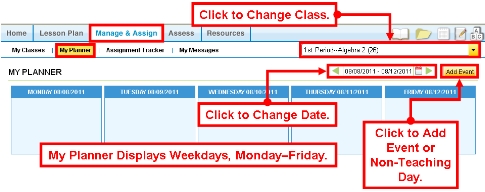
Figure 1. My Planner
You can add a Lesson Plan or a set of Lesson Resources to My Planner at any time.
Tip: Add known Non-Teaching Days to My Planner before adding Lesson Resources.
To add a Lesson Plan or Lesson Resources:
ConnectED displays the Add to My Planner dialogue box (Figure 4).
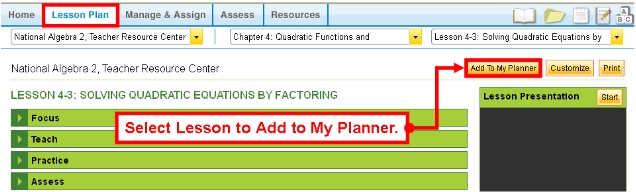
Figure 2. Add My Planner: Lesson Plan
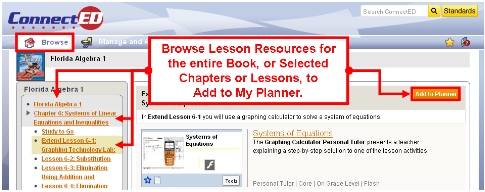
Figure 3. Add to My Planner: Lesson Resources
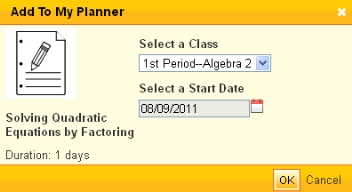
Figure 4. Add to My Planner Dialogue Box
NOTE: Your ConnectED Content may allow you to add (1) all Course Resources, (2) all Chapter Resources, or (3) Lesson Resources only.
ConnectED adds the selected Resources to My Planner beginning on the Start Date.
Tip: If you added Resources with multi-day Duration, your added materials may extend beyond the Start Date.
You can view, reschedule, or remove any Lesson that you have added to My Planner.
On the Menu bar:
ConnectED displays My Planner open to the current week.
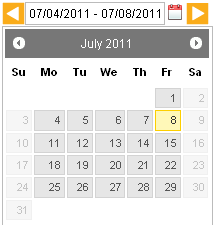
Figure 5. Navigation Tools
NOTE: My Planner displays by week, Monday through Friday.
ConnectED displays the Actions menu (Figure 6).
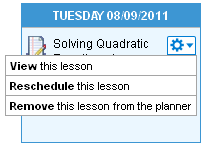
Figure 6. My Planner Tools Menu
You can now  View, Reschedule, or Remove the selected Lesson.
To view the selected Lesson:
OR
Networks displays the selected Lesson.
To return to My Planner:
OR
On the Menu bar:
To reschedule the selected Lesson:
Networks displays the selected Reschedule Lesson dialogue box (Figure 7).
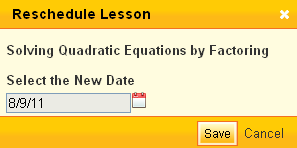
Figure 7. Reschedule Lesson Dialogue Box
Networks displays the planning calendar.
Networks reschedules the Lesson on the selected Date.
To remove the selected Lesson:
Networks displays the selected Remove from Planner dialogue box (Figure 8).
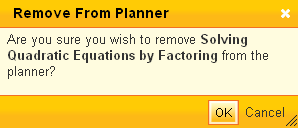
Figure 8. Remove from Planner Dialogue Box
Networks removes the Lesson from My Planner.
You can add an Event or Non-Teaching Day to My Planner at any time.
Tip: Add known Non-Teaching Days to My Planner before adding Lesson Resources.
To add an Eventor Non-Teaching Day
Select the appropriate Class using the Class-selection drop-down box at the upper right.
NOTE: Select a Class if Event pertains to selected Class only. See also instructions in Step #3.
From My Planner, click Add Event at the upper right.
ConnectED displays the Add Event dialogue box (Figure 9 and Table 1).
ConnectED adds the Event to My Planner.
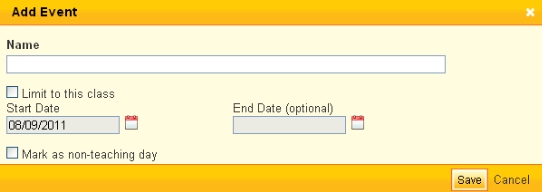
Figure 9. Add Event Dialogue Box
You can edit Event information at any time.
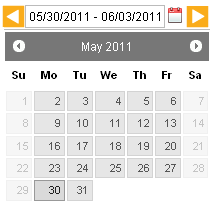
Figure 10. My Planner Navigation Tools
NOTE: My Planner displays weekdays, Monday-Friday.
ConnectED displays the Actions drop-down box.
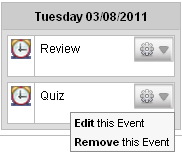
Figure 11. Edit this Event
ConnectED displays the Update Event dialogue box (Figure 12).
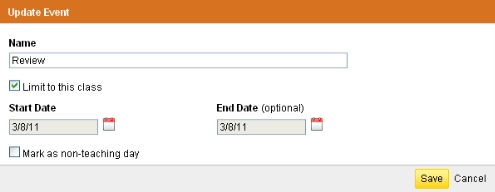
Figure 12. Update Event Dialogue Box
ConnectED updates the selected Event and displays My Planner.
You can remove an Event at any time.
To remove an Event:
ConnectED displays the selected day/date.
Figure 13. My Planner Navigation Tools
ConnectED displays the Actions drop-down box.
Figure 14. Remove Event
ConnectED displays the Delete Event message (Figure 15).
Figure 15. Delete Event Message
ConnectED deletes the selected Event.